A few days ago I shared my most recent Day in the Life session. Here are some tips to help you complete your own DITL:
Do pre-plan
Although I do try to capture a day as authentically as possible, the fact that I have to be both Mom and photographer in one day means that I’m trying to juggle two full time jobs at once, for the entire day. To help the day go smoothly, I do more prepping for the day than usual, the night before. Kids’ clothes set out, meals pre-planned, house cleaning done within the few days prior so I’m not having to worry about it during the DITL day, appointments either deliberately made or deliberately avoided- depending on if I want to photograph them or not, etc. Plan as a way to reduce stress during your DITL shoot.
Choose a “normal” day
More than once, I’ve tentatively decided on a day for the DITL shoot, then realized that we have some long, abnormal event that day, or that the preschooler doesn’t have school that day, which is an activity I like to document. When scheduling your DITL, think through your normal weekly events and choose a day that best represents your life as it is, now. Also be willing to reschedule if something pops up last minute, as it often does.
Overshoot, but not too much
I commonly end up with over 500 photographs from a single day during DITL shoots. That is A LOT of photos to cull and edit, especially as many of them were taken in unique lighting situations, so editing cannot be accomplished by syncing a single edit across the entire set. I allow myself to shoot a few frames if I’m waiting for a particular moment, or if I notice that my composition could be dramatically improved by a shift in position or perspective. However, I do continuously remind myself to stick with 1 frame of a particular scene if it is ‘good enough.’
Purposefully vary your perspective
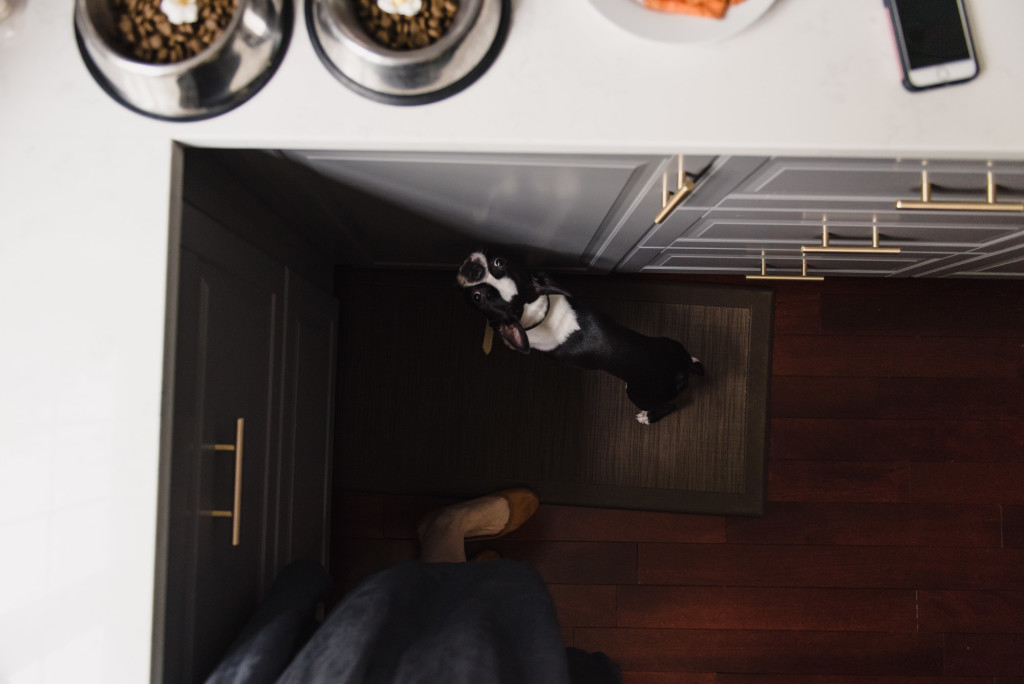
A set of 50+ images, all shot from adult standing height, face on towards the subject, is not going to be very interesting. Varying perspective is such a great way to add visual interest to a DITL shoot. Stand on chairs, shoot through fences and railings, shoot along walls, frame subjects through doors, take photographs that don’t include faces, capture the details. Basically, take all of the creativity that you’ve gained in your photography study thus far and cram it into one day of capturing your own life.
Get in the frame
Were you part of your family during the DITL shoot? Of course you were! Thus, you should be included in the photographs. Get out the tripod, or set your camera on a sturdy counter or floor and document you, as you go about your day. Self portraits are an exception to my ‘don’t overshoot too much’ rule, as it is often necessary to shoot quite a few because of the fact that you can’t frame yourself from behind the camera. I often shoot a test shot, check, adjust and reshoot several times before coming up with my keeper image.
Cull to maintain flow
It can be very tempting to cut out all but the best images when culling a DITL session. However, remind yourself of your purpose for taking on this project in the first place. Was it to provide an accurate recording of what your average day looks like, right now? If so, you’ll want to create a set that flows, and reads as a complete day. Maybe none of your dinner images turned out stellar and you’d like to mark them all for trash. Instead, find the one that does the best job of capturing the feeling of that dinner. If the image isn’t technically perfect, that’s ok. This project definitely helps a photographer practice technical skills, but the ultimate goal is personal documentation, so edit that ‘ok’ image so that it gives you an emotional tug and allow the technical lack to fade in importance.
Will you be shooting a DITL? Let me know in the comments!
-M
Pin It